Getting Started With An ADU
All about Accessory Dwelling Units (ADUs)—what they are, how much they cost, and what the process is like to design and build one.
An ADU we built above a garage in Bradford, VT in 2024.
Accessory Dwelling Units—or ADUs—are gaining traction in our neck of the woods.
And for good reason.
They’re typically small and efficient; they make use of property that you already own; and they’re highly flexible.
By definition, ADUs are additional living spaces added to a single-family lot. They can be attached (say, in a basement, attic, or unused portion of the house) or detached (like in a barn or a new standalone structure).
Over the past year, we’ve built four ADUs. And we regularly get calls from homeowners interested in creating an ADU for one of three reasons:
To create an additional income stream by renting the unit out;
To provide living space to a family member that wishes to co-locate; or
To host guests and furnish them with a private place to stay
Inevitably, we are always asked a) how much does an ADU cost? and b) what’s the process like to build one?
Let’s dive in.
A 1,000sf detached ADU we built in Orford, NH in the winter of 2023 as a guest house.
How much does an ADU cost?
Much of this depends on existing conditions of your property and level of finishes you want. But generally, here’s what we’re seeing.
Attached ADUs: $100,000-$250,000
Lower end when existing utilities are sufficient, there’s no exterior work, framing is in good condition, and space is already insulated
Higher end when dealing with septic and water capacity upgrades, siding, roofing, and reframing structure (e.g. adding a dormer)
Detached ADUs: $200,000-$350,000+
Lower end when choosing easy-to-install products (e.g. vinyl siding, LVP flooring), simple layout, and smaller footprint
Higher end for more custom and larger structures
Each project is unique, though.
If you’re interested in getting some pricing for your ADU project, just give us a call and we can discuss.
What’s the process to design and build an ADU?
Before any work can start on site, there are a few pre-construction activities to complete:
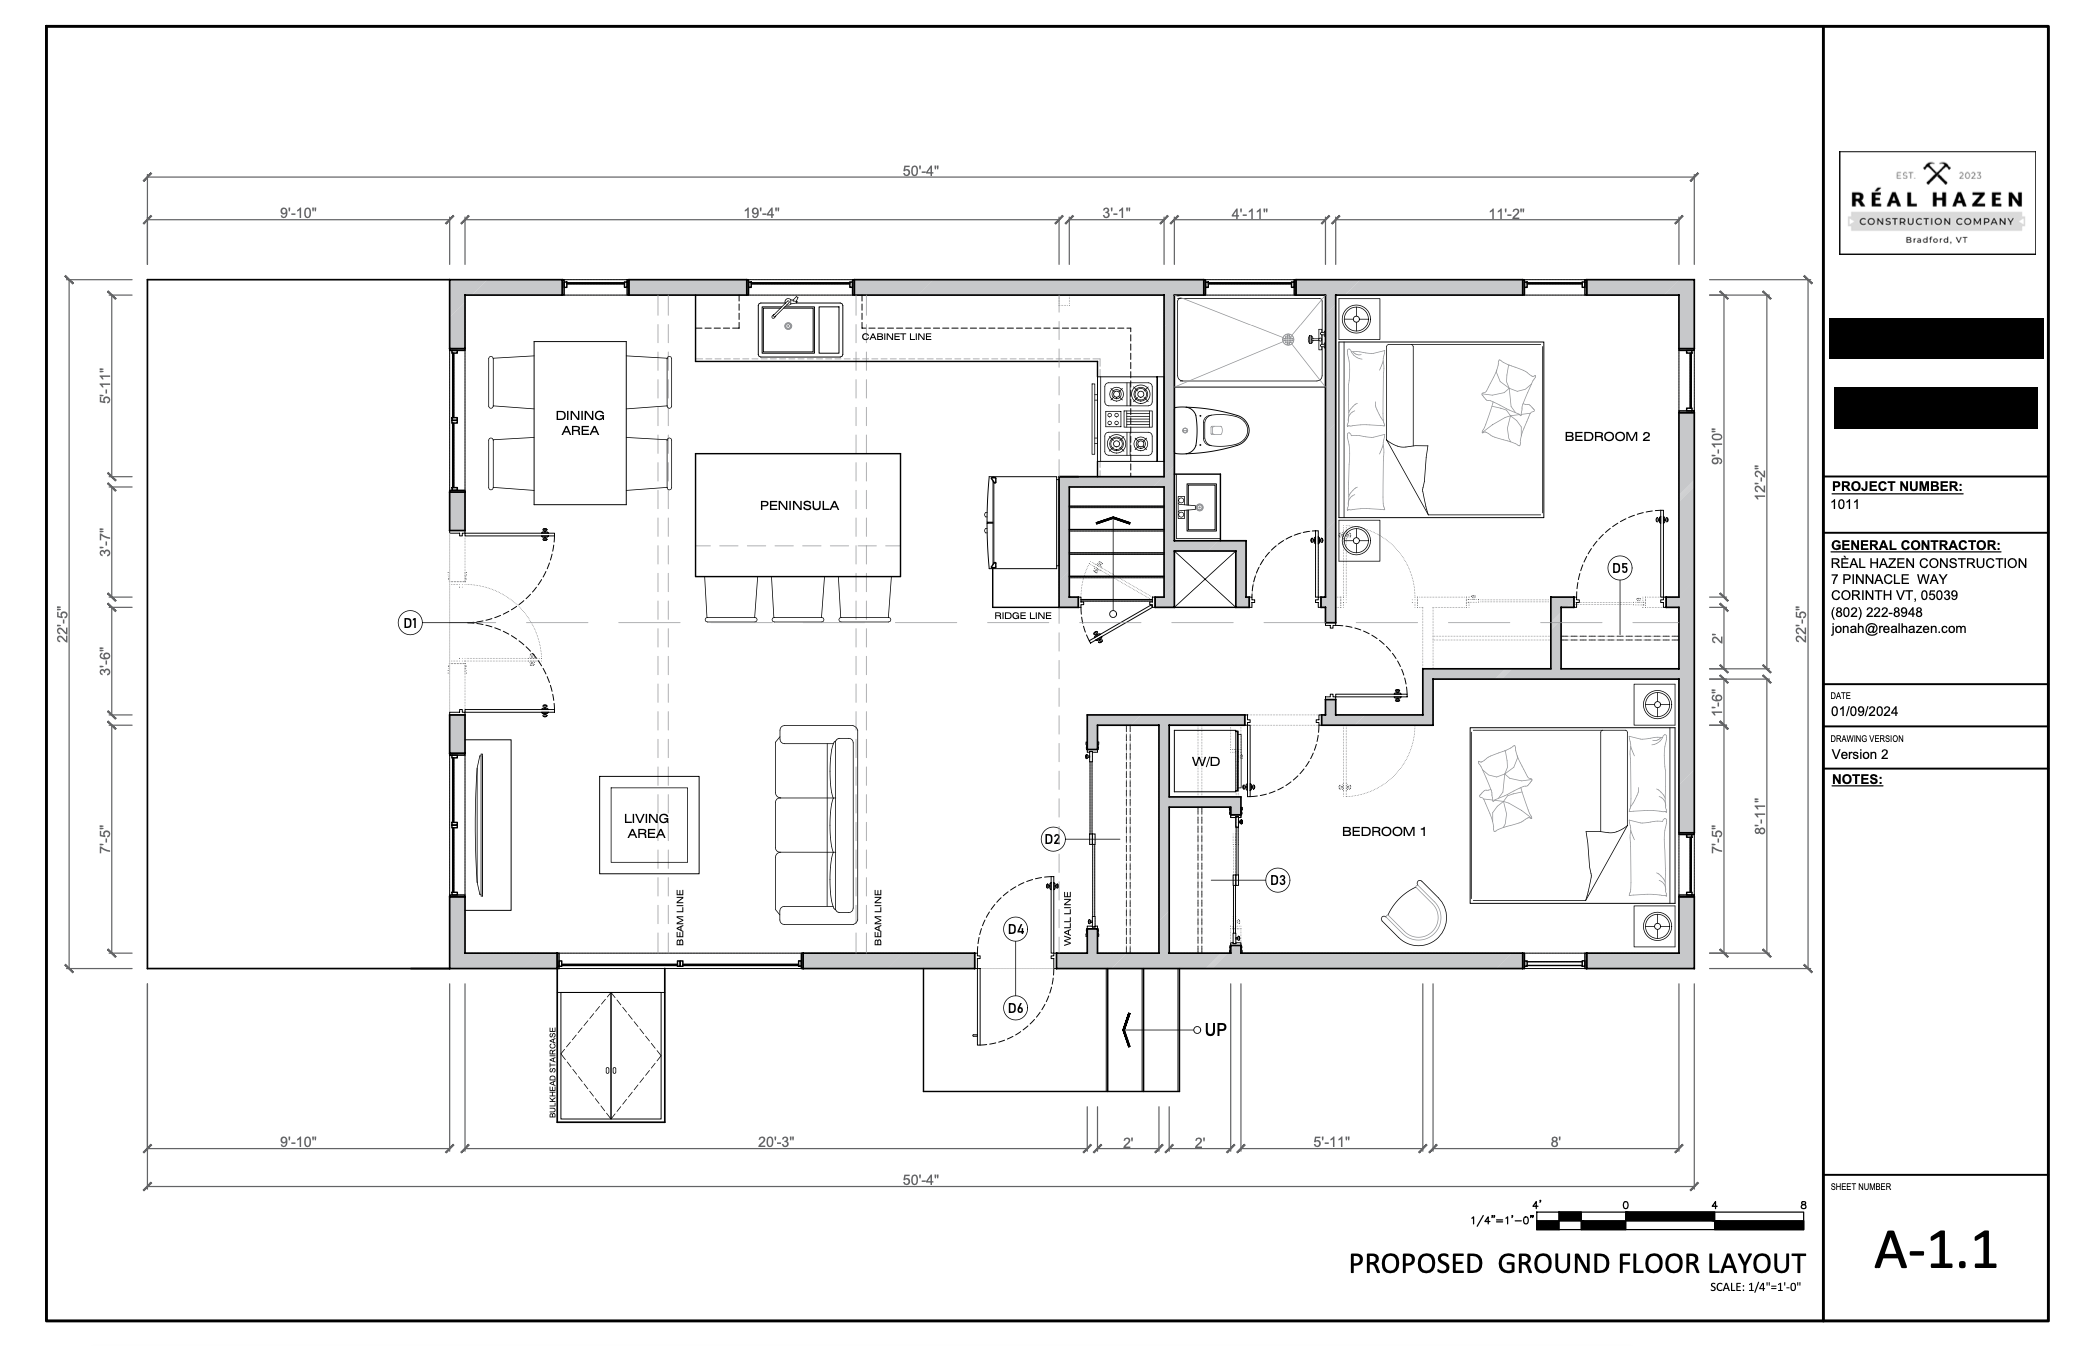
Draft floor plans (always) and elevations (if any new construction)
Develop a scope of work
Create a detailed budget
Obtain zoning and construction permits
We can typically get the first three activities done in two weeks. Permitting timeline depends entirely on the town. In some instances, we’ve been able to do this in less than a week.
The starting point of an old horse barn in Bradford, VT we began converting to an ADU in 2023.
Drafting construction plans
A real set of plans pays dividends by driving efficiency during construction.
In addition to general layout and flow of the space, we like to hone in on:
Window and door sizes
Kitchen and bath layout
Lighting plan
Placement of mechanicals (heating elements, ductwork, water heaters, etc)
There are certain elements—like establishing a wet wall for plumbing stacks—that, if properly planned for, will end up saving thousands of dollars in avoided labor and materials during construction.
We have drafting capabilities in-house (e.g. the floor plan below was created by someone on our team), however, we still like to bring in a local architect to support design. This just helps ensure we’re making the best use of the limited space we have available on your property.
Dan Haedrich at Backtilt Studio is an architect we work with frequently and an expert in designing beautiful spaces that are compact and energy efficient.
Developing a scope of work
A scope of work helps us quickly align on your vision and allows us to move through construction without interruption. Here, we identify things like:
Window and door specs (material, insulation value, brand, etc)
Which walls/areas are remaining untouched (important for projects with existing framing or partially finished spaces
Lighting and plumbing fixture selection
Insulation package
Here’s an example of a scope of work you’d see on our projects.
Creating a detailed budget
Once we have plans and a scope of work, we can work up a budget.
As general contractors, we have a network of subs (plumbing, electrical, insulation, site, etc) that we work with regularly. At this stage, we bring them into the conversation and solicit estimates.
In parallel, we work through the carpentry estimate in-house. All framing and finish carpentry scope are completed by us directly and so we’re able to quickly identify labor and material requirements.
Here’s an outline of a detailed budget we would develop.
The finished ADU from the converted horse barn in Bradford, VT referenced above. Completed in 2024.
Beyond design
With pre-construction now complete, we’re off to the races.
We’re then on site with 2-4 guys on a daily basis until the job is done. Depending on the size of the project, that’s somewhere between 2-4 months.
During construction, expect frequent communication—we like to keep our customers updated every step of the way.
So, if you’re thinking about an ADU, feel free to reach out directly to me. My email and cell are below.
Stay building,
— Jonah
Jonah Richard
Co-owner / Project Manager, Réal Hazen Construction
General Contractor and Homebuilder
(802) 222-8948
jonah@realhazen.com
@realhazenbuilds


